Product import with customer choice - Textalk Abicart

What should the file look like to import the customer's choices?
In a normal import, only the item number is needed to identify the product, but to import the customer's choice, an additional item number is needed for the choice (variant) itself. So, to create a brand new product with the customer's choice via import, at least the following properties need to be included in the file:
- article number (for the main product)
- product name (in the store's base language)
- item number for customer selection
- Name of customer's choice, e.g. "Colour"
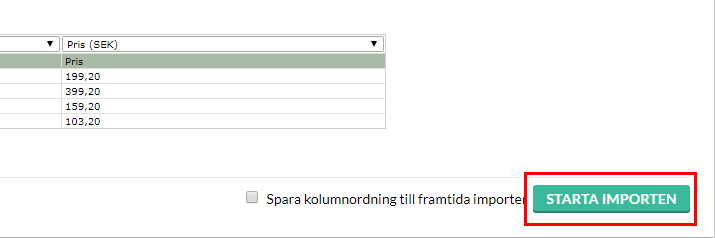
- price (in the store's base currency)
Example of what the import file might look like when importing a product with three sizes and two colours.

In the example above, the sizes small and medium cost the same, 100 SEK, while large costs 125 SEK. You can also import other product properties such as description, weight, etc. in the import, but above are the columns that are mandatory to create a new product in an import.
It does not matter in which order the properties are located in the file. When you do the actual import, you select the property for each column. More on this below.
Create import templates
In order to import the customer's choices, you first need to create so-called import templates for the choices. For example, if you want to import sizes and/or colors, you need to create a template for each customer choice. In this example, one for "Size" and one for "Color".
Go to Assortment -> Import.
In the top block "About Import", there is a heading a bit down called "Importing the customer's selection". Then click on the link "Customer Choice Import Templates"
Click on "Add new".
Here are a number of options:
- Name - Please enter a name for the template, for example "Size".
- This option may have a price impact - If certain options are to cost extra, you need to enable this setting.
- A possible price impact is applied before the price is multiplied by the numeric text fields that affect the quantity - If you use two text fields where the buyer has to enter different values, for example if you sell a product where the buyer has to enter his own measurements for height and width. Then you can check this setting and these values will be multiplied before the price is added. This will give you, for example, a price per square metre of the product.
- This selection may affect weight - If some selections weigh more than the original product, you need to activate this setting.
- Single properties (stock balance, item number, picture) - If you want to be able to specify a stock balance or link a picture to each selection, this setting should be enabled. You should always check this box.
Click the save button when the template is finished.
The most common settings are "This selection may have price impact" and "Custom properties".
If you have products with several different properties, such as color, size, model, material, etc., you need to create a template for each property.
Import customer's choice in Abicart
Go to Assortment -> Import.
In "Select file", select the file you want to import.
Double check that "Automatic" is selected in both "Fields are separated by" and "Character coding" and that "Update information" is selected in "If product already exists in the assortment". See picture.

Then click the continue button in the bottom right corner.
This will take us to the following page.
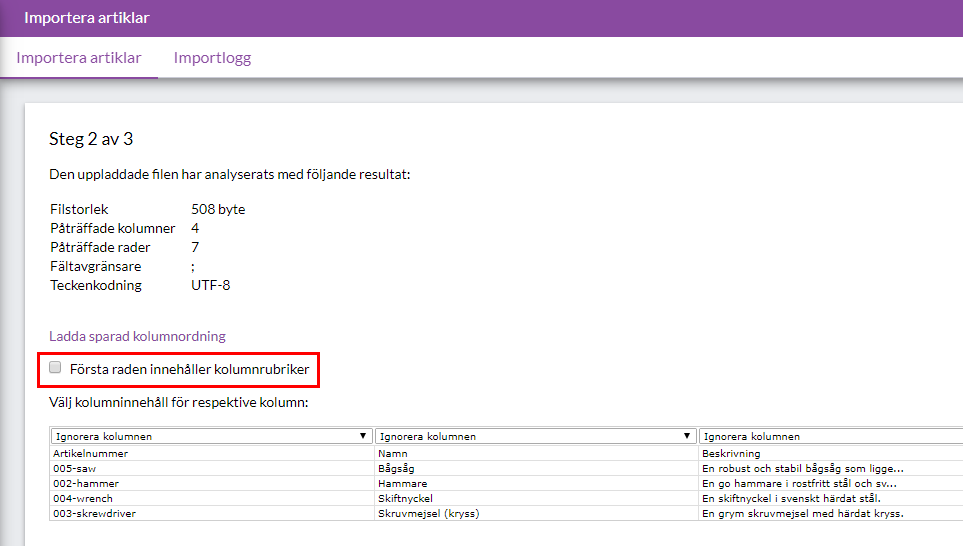
In this example, there are headings in the first row of each column in the import file. We don't want to import these, so we check "First row contains column headings".
In order for the system to know which column contains each property, we need to select this. Since we have clear column headings, it is easy to select. Part number in the first column and product name in the second, etc. Select the column for all properties to be imported.
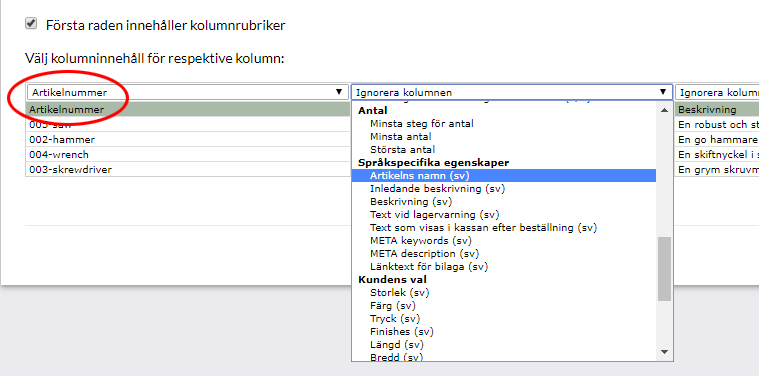
If you have many properties, you may need to scroll sideways to see all the columns. If there is a property you don't want to update, select "Ignore Column" and it will be skipped.
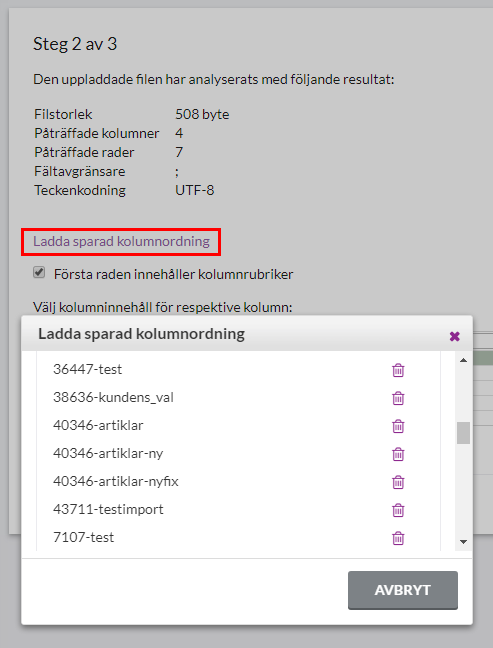
Before we start the import, there is a checkbox called "Save column order for future imports". If you have a lot of properties that you want to update, and you know that you will be doing this kind of import several times, you can save a template for the column order.

If you tick it, next time you can click on the "Load saved column order" link instead of selecting each column one by one. Note that it must be exactly the same column order in the file for it to be correct.
If you know that this import will only be done once, leave the checkbox next to "Save column order for future imports" blank, and then click "Start import".
Depending on how many lines (articles) there are in the file, this will take different amounts of time. If there are only a few lines, it can be done in a few seconds, but if there are many, thousands of lines, it can take half an hour, an hour or even several hours. Wait until everything is ready. Hopefully it will look something like this picture.
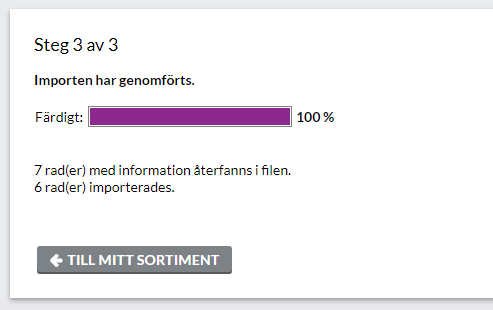
In this case, there were seven lines in the file. We checked that the first line contained headers, so it was ignored. The remaining six lines were imported.
Things to consider:
- Products with customer selections must have a master item number and a unique item number on each selection.
- Variants of the same product must be directly below each other in the file. They are imported in the order they are listed in the file.